

What Is Thermal Shock in Glass? Understanding Sudden Temperature Changes...
Read MoreHow to Photograph Candlelight Without an Orange Colour Cast
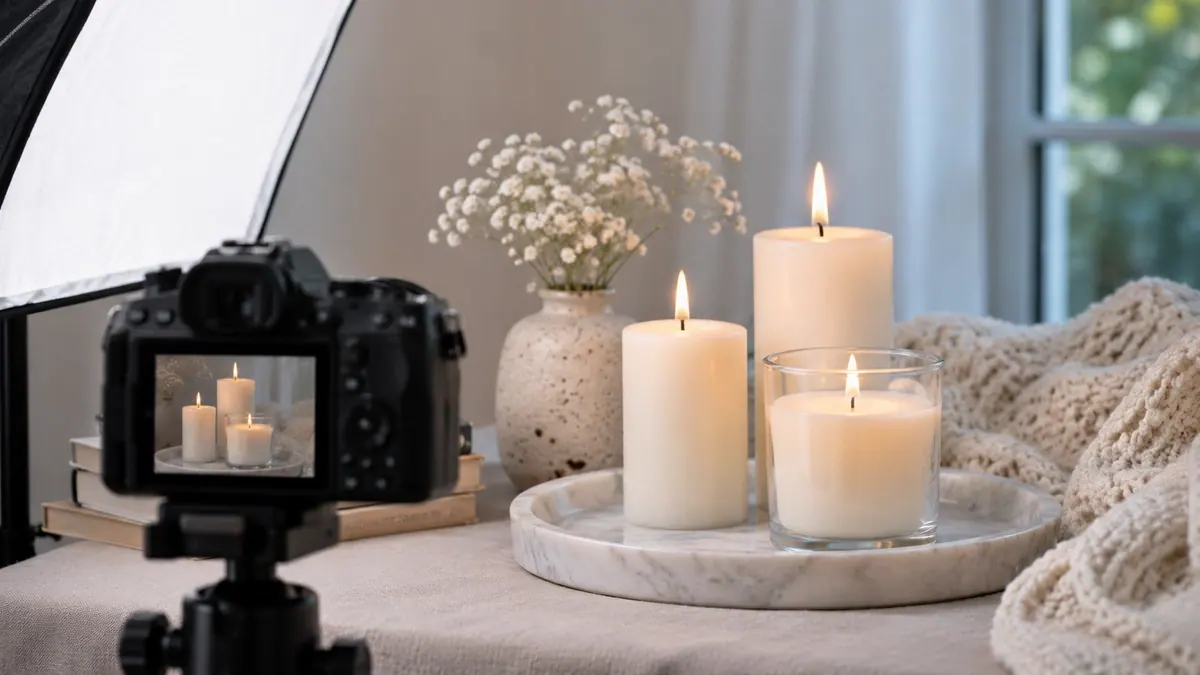
A candlelit table can look gently golden in person and almost entirely orange in a photograph. The difference becomes obvious when a white plate turns peach, a grey napkin looks brown, or a face takes on the same colour as the flame. If the frame also contains a bright, shapeless patch where the wick should be, you have two separate things to fix. The colour cast calls for better white balance or lighting, while the lost flame detail calls for a different exposure.
The most reliable way to photograph candlelight is to decide where you want the warmth to stay. A little gold around the wick, along the rim of a glass, or on the side of a face tells the viewer where the light came from. A more neutral tablecloth or softly lit face gives that warmth something to stand against. You can make both choices before you pick up the camera.
Start with one candle and one object whose colour you know. Take an automatic test frame, then compare it with a slightly darker exposure and a cooler colour balance. This simple sequence shows you which adjustment makes the biggest difference. From there, the same approach works for a dinner portrait, a close-up of a flame, or a wider room scene.
Why candlelight turns photographs orange
White balance is the camera or editor’s way of compensating for the colour of the light. Candlelight illuminates nearby objects with a strongly warm cast. Your visual system tends to adapt to the room, so you can still recognise a familiar white plate. Exploring why candle colours look different in lighting explains how correlated colour temperature (CCT) and human visual adaptation interact under warm ambient sources. The photograph may preserve much more of that cast, particularly if the camera leaves some warmth in place or has few neutral objects to guide its automatic correction.
Auto white balance can also change its interpretation between frames. Include more of a blue window in one composition and more of a wooden wall in the next, and the camera may render the same candlelit table differently. For a series of images taken under the same lighting, a fixed setting gives you a consistent baseline. If your camera has a Kelvin control, try 3200 K and compare it with a lower setting such as 2800 K. These are starting points for the rendered image. The right value depends on the scene and how much warmth you want to retain.
White balance acts across the frame. When candlelight falls on one cheek and daylight on the other, cooling the whole photo may improve the warm cheek while making the window side blue. You can often make a bigger improvement by turning off a ceiling light, moving away from the window, or choosing one source to light the face. Decide which surface matters most and judge the balance there.
Set exposure for the flame and the subject
A flame is much brighter than the table around it. Automatic exposure can brighten the darker parts of the frame enough to turn the flame into a featureless white shape. A tiny bright core can look natural. If the whole flame loses its outline and the glow spreads across the rim of the jar, reduce the exposure and take another frame. On a camera with exposure compensation, compare the meter’s suggestion with −0.7 EV and then −1.3 EV. In manual mode, try a faster shutter speed while keeping your aperture and ISO fixed for the comparison.
Magnify the image and look for the transition from the wick to the bright core and the softer outer edge. Understanding candle flame temperature zones clarifies why the incandescent inner core emits vastly higher luminance than the cooler golden outer boundary. The histogram or highlight warning can help, but a flame may occupy too little of the image to create an obvious spike. An RGB histogram, if available, can also show when a colour channel reaches its upper limit. A warm subject can lose detail in the red channel before the overall image looks especially bright.
When protecting the flame leaves a face or tabletop too dark, add a little light to that area. Try bouncing a dim lamp from a neutral wall or using a soft light placed off to one side. Look at the frame before and after adding it. You should see more shape in the face or texture in the linen, while the candle remains visibly brighter than its surroundings. Keep equipment, fabrics and reflectors well clear of the candle, and extinguish it before moving the setup.
Starting settings for a camera
A close-up of the wick and flame
Try manual exposure, RAW capture, 1/125 second and f/4. Set ISO according to how much light the scene has, starting around ISO 400 for a test and adjusting after inspecting it. If the flame smears as it moves, compare a frame at 1/250 second. Examining why a candle flame is teardrop shaped illustrates how upward gas convection causes subtle motion at the tip that faster shutter speeds freeze cleanly. Focus on the wick or a nearby stationary detail at the same distance. In a tight composition, even small differences in focus can make the tip of the wick sharp and the front of the jar soft. If both need to be clear, move back slightly or use a smaller aperture and reassess exposure.
A portrait at a candlelit table
Begin around 1/125 second for a seated person and choose an aperture such as f/2.8 if your lens allows it. Use a faster shutter for a lively conversation or moving hands. Focus on the nearer eye and check the face at full size. A tripod steadies the camera, but it cannot freeze a person turning their head. If the exposure that preserves the flame leaves the face too dim, provide gentle fill light and take a new test frame. For two people at different distances, align their seats more closely in the frame or stop down to give yourself more depth of field.
A still table scene on a tripod
For a still arrangement, compare a handheld frame with a tripod frame taken at a lower ISO and slower shutter speed. A setting around 1/30 second can be a useful trial if you are willing to let the flame move a little during the exposure. Look closely at the candle and the surrounding objects. The glass and place settings may appear clean while the flame looks elongated. Choose the faster frame if you want to show the precise shape of the flame, and the slower one if you care more about the table and the glow. For those looking to experience authentic evening ambiance firsthand, joining a candle making in candlelight workshop offers an atmospheric setting to craft and observe glowing flames in person.
How to photograph candlelight with a phone
Use the phone’s main camera and move to a safe shooting position that gives you the framing you want. Clean the lens first. Fingerprints can scatter light and make a small flame bloom across the picture. Tap the subject to set focus, then use the exposure control to bring brightness down until the flame has a recognisable edge. On an iPhone, touch and hold the focus area to engage AE/AF Lock when you want to keep the current focus and exposure while taking several shots. On other phones, the available controls vary by model and camera app.
Compare the standard photo mode with night mode if both are available. A longer capture can help a static room, but a moving person or a flickering flame can look softer or show odd edges. Review the image at full size rather than trusting the preview. If the phone offers a manual or Pro mode, test a fixed white balance for a series. With a standard camera app, simplify the lighting before shooting and use the editor’s warmth adjustment afterwards. An exposure or focus lock alone may leave white balance under automatic control.
Edit for neutral surfaces and a warm glow
Start with a RAW file when your camera supports it. RAW gives you more room to revise white balance after capture, especially if the initial setting was far from what you wanted. Use a matte neutral grey reference photographed in the same light as the main subject. Sample that reference with your editor’s white balance tool, then warm the result slightly if the scene feels too cool. A glossy white plate can be misleading because its brightest areas may reflect the flame directly. A neutral patch illuminated mainly by a different light source can also push the correction in the wrong direction.
Use the temperature slider to address yellow or orange warmth and the tint slider only if you also see a green or magenta bias. Then inspect the bright areas and reduce highlights gently if there is detail to recover. Where the original capture is fully clipped, darkening that area can change its brightness without restoring the missing structure. If a face still looks too warm after the overall balance is set, try a local adjustment on the face and leave the candlelit reflections alone. Check the exported photograph at the size people will actually see it. At social media scale, a delicate flame edge can disappear even when it looks clear in the full-size file.
A simple comparison to find your preferred look
Set a candle beside a neutral mug or a grey card, leaving ample clearance. Keep the camera position fixed. Take one automatic frame and one darker frame. Then make two copies of the darker frame in your editor and change only the temperature setting between them. Use the mug or card to judge how much orange is present. Use the flame edge to judge exposure. With those questions separated, you can identify which change improved the photo and keep the same approach for the next scene.
Now try the same comparison with a lamp switched on and off. Watch what happens to the shadow side of the mug. If the lamp creates a visibly different colour there, reposition it or remove it and take another test. For a portrait, ask the person to turn slightly between shots and compare the two sides of the face. Small changes in where the light falls often save more editing time than a large global colour adjustment.
Key Takeaways
- Judge colour on neutral surfaces: Evaluate orange colour casts using a familiar white object, grey card, or natural skin tone rather than the flame itself.
- Set a fixed Kelvin white balance: Start near 3200 K and test cooler values like 2800 K to prevent automatic camera shifts between shots.
- Protect flame highlights first: Lower exposure compensation by −0.7 EV to −1.3 EV so the flame retains its gradient instead of blowing out to pure white.
- Add gentle off-camera fill light: Bounce a dim lamp off a neutral wall to illuminate faces and tabletops without overpowering the candle’s natural glow.
- Lock phone focus and exposure: Clean smartphone lenses before shooting and use AE/AF Lock while dragging exposure down to keep flame edges sharp.
Frequently Asked Questions
Should I make the candle flame white in the edit?
A flame can have a very bright core and still show warm colour at its edges. Use the face, table linen or another familiar surface to guide the overall white balance. This leaves space for the flame to look naturally warm.
Why does my candle have a large orange halo?
Light scattering on a dirty lens or a filter can enlarge the glow. Try cleaning the lens, removing an unnecessary filter where applicable, or shifting the shooting angle. Also check exposure, since clipped highlights can make the bright area appear larger.
Can I fix orange candlelight in a JPEG?
A modest warmth adjustment can improve a JPEG. A strongly orange file may show unpleasant colour changes if pushed far, particularly in skin tones and dark areas. Test a cooler setting during capture or use RAW when available.
Should I use flash at a candlelit dinner?
Direct flash can dominate a small candle and flatten the shadows that make the scene feel candlelit. If the face needs light, use a soft, low-level source from the side and take a test frame to see how much of the original glow remains.
How do I keep a series of candle photos the same colour?
Keep the light sources in place, set a fixed white balance if you can, and photograph a neutral reference. In editing, apply the same starting balance to frames taken under the same lighting, then check individual photos for changes in subject position or nearby reflections.
Why is my flame sharp but my subject blurry?
The flame and subject may sit at different distances from the camera. Focus on the subject if that is the priority. To keep more of the scene clear, bring them closer to the same focus plane where practical, step back, or use a smaller aperture and review your exposure.
Photography references: Adobe Lightroom Classic white balance and tone • Apple iPhone camera focus and exposure
About Studio Kinza
Studio Kinza is a Dubai-based artisanal candle studio located in Warsan, International City, crafting clean-burning handcrafted soy candles from non-toxic botanical waxes and fine fragrance oils. Through hands-on workshops, evening candlelight sessions, and educational guides, we explore the craft, aesthetics, and science of candle making.
Plan Your Experience
Looking to create your own artisanal candles or experience a warm evening workshop in Dubai? Contact the Studio Kinza team to reserve seats in a public session, arrange a private group workshop, or enquire about bespoke candle experiences.

Heat Transfer Through Glass Candle Containers
How Does Heat Travel Through a Glass Candle Container? Look...
Read More

How To Photograph Candlelight
How to Photograph Candlelight Without an Orange Colour Cast A...
Read More