

What Is Thermal Shock in Glass? Understanding Sudden Temperature Changes...
Read MoreHow Is Candle Burn Time Measured in a Controlled Test?
A candle can take two weeks to finish while spending far less than two weeks alight. If you light it for an evening, let it cool overnight and relight it the following day, only the time with a flame counts toward its burn time. A controlled test keeps track of each of those intervals and defines the point at which the candle is finished for the purpose of the measurement.
That last detail matters. A container may still hold wax when the test ends. Two candles with the same starting fill can also use wax at different rates or leave different amounts behind. A useful burn-time result therefore tells you what was tested, how the sessions were run and why the tester stopped. The number alone leaves those questions open.
For candle makers and students, measuring candle burn time is a good example of how to turn an everyday observation into a repeatable comparison. A timer supplies the main result. Notes about the samples, room conditions and final session make it possible for someone else to understand and repeat the test.
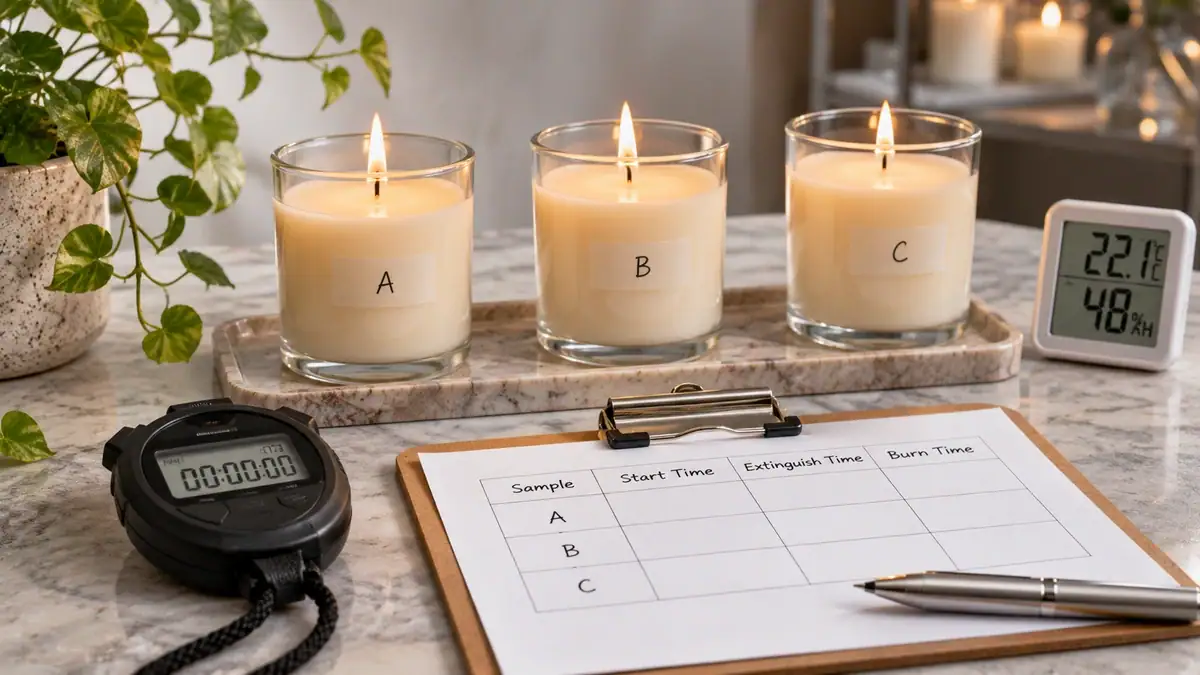
Define exactly what the timer measures
Total burn time is the sum of the periods when the candle is alight, up to a defined stopping point. A session starts when the wick is lit and ends when the candle is extinguished or the flame goes out. Cooling, overnight breaks and setup time belong in the schedule but stay out of the total. Record the actual times, even when a session runs shorter than planned.
For example, suppose a hypothetical log contains sessions of 90, 90 and 55 minutes. Add those intervals to get 235 minutes, or 3 hours and 55 minutes. The last session contributes 55 minutes because that was the time actually observed. Treating every scheduled session as a full 90 minutes would overstate the result. These figures illustrate the calculation and describe no particular candle.
Define the endpoint before collecting data. For an ordinary use-based comparison, follow the candle’s instructions for when to stop and treat any abnormal behaviour as a reason to end the observation safely. If you stop because the room is closing or because you have reached the end of the observation period, record the result as partial. A candle still burning normally after six measured hours has demonstrated those six hours under the test conditions. Its final duration remains unknown.
Set up a fair comparison
Identify the samples
Give each candle an ID and record its design or batch, starting wax fill if known, container dimensions and wick configuration. For a development comparison, use samples of similar age and condition. Understanding candle curing vs cooling helps makers ensure all test candles have stabilized for the same rest period before ignition. A tester who changes both the wick and the wax blend can compare the two finished candles, but the result cannot tell them how much of the difference came from the wick alone.
Use several candles of each design where possible. One sample may have a wick slightly off centre or may differ in fill. Repeating sessions on that same sample provides more information about its lifetime. Testing separate samples provides information about the variation between candles. Those are different questions, and both can matter when interpreting a result.
Keep the room and routine consistent
Use a stable, level, heat-resistant surface, away from drafts and combustible material. Exploring candle flame airflow science explains why an air-conditioning vent can disturb combustion and accelerate wax consumption even in a room that feels still where you are sitting. Keep enough separation between samples and arrange them so that one candle’s heat does not influence another. Keep every lit candle within sight, and follow its use instructions throughout.
Record the approximate room temperature and any interruption such as a fan being switched on or a door being left open. Use the same planned session duration and cooling routine for comparable samples, within each candle’s instructions. Start each new session only after the candle has cooled as required. Prepare the wick according to the product instructions and note any variation in what you actually did. If two products have different use instructions, explain how each was tested so readers can see that the routines differed.
What to write down during each session
A useful log can be as simple as one row per session. Record the sample ID, session number, ignition time, end time, actual minutes, cumulative minutes and reason for stopping. Add observations at consistent points in the session when practical. Describe what you see in plain language, such as a visibly off-centre melt pool or a flame that repeatedly went out. Separate observations from possible explanations.
Imagine that one candle goes out well before the planned end of a session. Write down the time it happened and what you observed immediately beforehand. Record whether the test protocol treats that event as the endpoint. If a session is cut short because the observer must leave, extinguish the candle and log the interruption. The elapsed minutes still count as observed flame time, but the session schedule has changed and that difference may affect the comparison.
Photographs can supplement notes if you take them consistently and without handling a lit or hot candle. A fixed camera angle makes it easier to compare the appearance of the melt pool across sessions. A photograph is less useful when it shows no sample ID or time. Pair it with the written log so the observation can be traced to the correct point in the test.
How weighing adds context
Mass measurements help explain how quickly the candle is being used. If weighing is part of the plan, weigh the assembly cold on the same scale before and after a session. Keep the components on the scale consistent. Make a note of anything removed between readings, including wick trimmings, because a change in total assembly mass can include material removed by the observer.
Suppose a cold candle assembly weighs 312.4 g before a session and 304.0 g after cooling. The difference is 8.4 g. If the candle was alight for two hours, that is an average assembly mass loss of 4.2 g per hour over the session. The jar and wick assembly are included in the readings, so the calculation describes the difference between the two weighings. It does not mean the starting candle contained 312.4 g of wax.
Avoid extrapolating a single session’s rate over the whole candle. Understanding why candle wax melts and the science of candle making highlights how thermal geometry changes as the melt pool descends deeper into the vessel. The wick and melt pool can behave differently later in the candle’s life. Some wax can remain along the walls or below the point at which burning should stop. Dividing the starting fill by an early mass-loss rate assumes all the fill is available and that the rate stays constant. Measuring the full sequence answers the duration question more directly. For a classroom demonstration focused on comparing mass loss, see the National Candle Association’s science projects.
Report the spread as well as the average
Imagine three samples of one design finish at 19 hours 40 minutes, 20 hours 10 minutes and 20 hours 40 minutes. Their mean is 20 hours 10 minutes, and the observed range runs from 19 hours 40 minutes to 20 hours 40 minutes. Reporting both values shows what the small group actually did. Reporting the sample count makes it clear how much evidence supports the result.
Keep interrupted tests and unusual outcomes visible in the summary. For instance, if a fourth sample is withdrawn after six hours because of an abnormal observation, record its status separately and explain why it was withdrawn. A mean of three completed samples can still be calculated, provided the report says which samples contributed and describes what happened to the fourth. Readers can then distinguish normal variation from a different kind of outcome.
A repeatable result tells you what happened for the samples under a particular procedure. Shorter sessions, differences in wick preparation and airflow can change the conditions. Two published durations are easier to compare when the companies disclose similar endpoints and session rules. A small set of measurements also leaves uncertainty about other units and batches.
Separate duration from fire safety testing
A timing log measures duration under the chosen conditions. Formal fire safety evaluation addresses whether the design meets the requirements of the applicable standard. ASTM F2417, for example, is a fire safety specification for candles. Its scope is different from a simple comparison of how long two samples stayed alight. For compliance work, use the applicable standard and a qualified testing process.
For a learning exercise, follow the candle label and keep sessions attended. Reviewing expert candle care tips to make candles last longer reinforces essential habits like trimming wicks between sessions and respecting maximum burn windows. The National Candle Association advises keeping lit candles away from things that can catch fire and stopping use of container candles with wax still remaining. A longer observation never takes precedence over the product instructions or the need to extinguish a candle safely. Where only a brief observation is practical, report the measured interval and describe it as such.
Key Takeaways
- Count only active flame-on minutes: Add the actual lit intervals across separate sessions while excluding cooling and overnight rest periods.
- Establish stopping endpoints upfront: Define exact completion rules—such as remaining wax thresholds or safety cutoffs—before starting the timer.
- Control environmental and sample variables: Keep room temperature, airflow, wick trimming, and cooling routines identical across test candles.
- Track hourly consumption by mass: Weigh cold candle assemblies before and after burn sessions rather than extrapolating from a single early cycle.
- Report both averages and ranges: Share the full spread across multiple samples and log any interrupted or self-extinguished candles separately.
Frequently Asked Questions
Is burn time measured in one continuous session?
A use-based comparison can use several supervised sessions, with cooling between them according to the candle’s instructions. Add only the periods when the candle is alight. A long total duration does not indicate how long any single session should last.
Does a candle have to use all its wax?
The test ends at its defined stopping point, following the candle’s instructions for a use-based comparison. Wax left in the container at that point is part of the result. Record the remaining wax where relevant and leave it in place.
Can one burn cycle predict the total duration?
A single session shows how the candle behaved during that interval. It may provide a useful mass-loss measurement, but it leaves questions about later behaviour and how much wax will remain at the end.
How many candles should be tested?
The number depends on the purpose of the study. One candle gives a demonstration. Several separately prepared samples give an initial view of variation. Larger samples and multiple batches can help when the goal is to understand production consistency.
Why might two identical candles give different times?
Small differences in wick position, fill or manufacture can affect the result. Differences in airflow or the session routine can also contribute. Document the conditions so you can investigate plausible causes before attributing the variation to the candle design.
What happens when the candle goes out by itself?
Record the observed time and the reason as self-extinguishing. Apply the endpoint rule specified in the plan and follow the product instructions. Keep that outcome distinct from a session ended at the scheduled time or stopped for another reason.
Candle testing references: National Candle Association science projects • ASTM F2417 fire safety specification • National Candle Association candle safety tips
About Studio Kinza
Studio Kinza is a Dubai-based artisanal candle studio located in Warsan, International City, crafting clean-burning handcrafted soy candles from non-toxic botanical waxes and fine fragrance oils. Through hands-on workshops, masterclasses, and educational guides, we explore the science behind candle materials, scent, and combustion.
Plan Your Experience
Curious to explore wick sizing, wax formulation, and custom fragrance blending in a guided studio setting? Contact the Studio Kinza team to reserve workshop seats, arrange private group sessions, or enquire about bespoke candle experiences in Dubai.

Heat Transfer Through Glass Candle Containers
How Does Heat Travel Through a Glass Candle Container? Look...
Read More

How To Photograph Candlelight
How to Photograph Candlelight Without an Orange Colour Cast A...
Read More